How to Setup Brother Printer on WIFI: A Stepwise Guide
We all know the importance of wireless connections in this digital world. Gone are the days when we relied on conventional methods to setup our devices and printers. In this modern era, every industry and educational institution uses wireless technology to connect their printers. If you want to learn how to setup Brother printer on WiFi, this is the right place for you.
As
a printer expert, I deal with people’s queries and concerns. In today’s blog,
I’m addressing the most crucial part of printer use. If you are excited to
learn about the printer wireless setup on your device, stay with me until the
end to avoid missing anything.
Step 1:
Things to Consider Before Brother Printer Setup
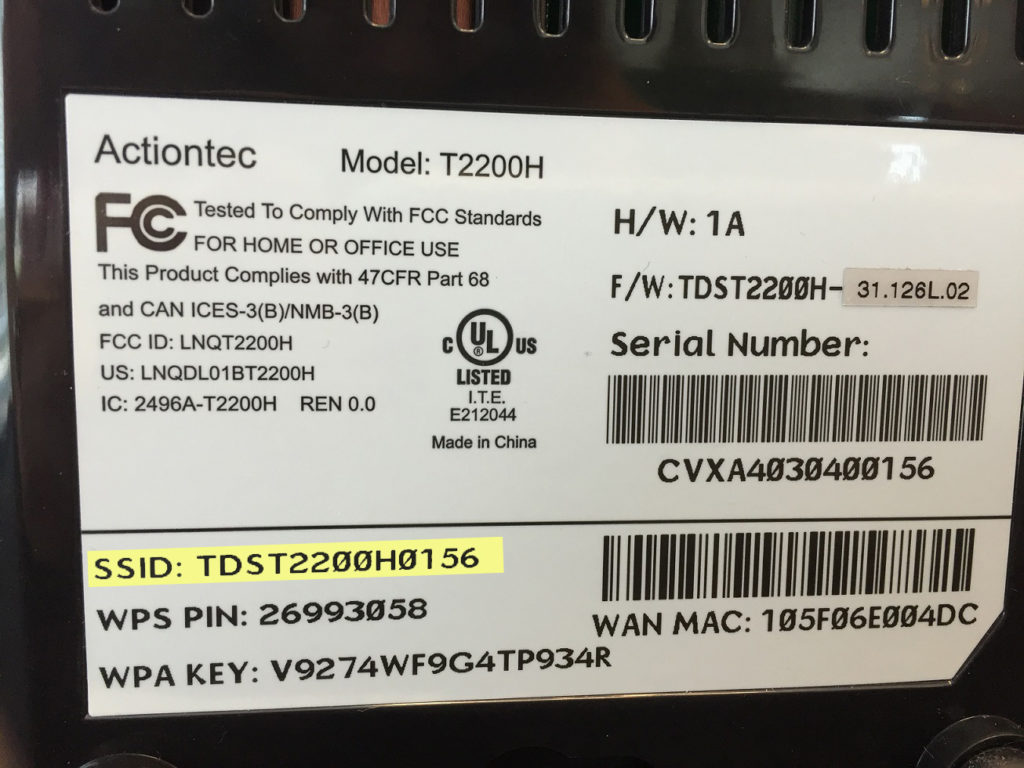
Before
you start connecting your printer to WiFi, you should consider a few things.
You must check your WiFi router or modem to initiate the connection. Then, you
should note down the network key and home network from the back of your router.

The
home network is also known as the SSID network. You will get all this
information on the backside sticker of your router. Once you have noted down
everything, you’re good to go with the setup connection.
Step 2:
Download Printer Drivers from Its Official Website
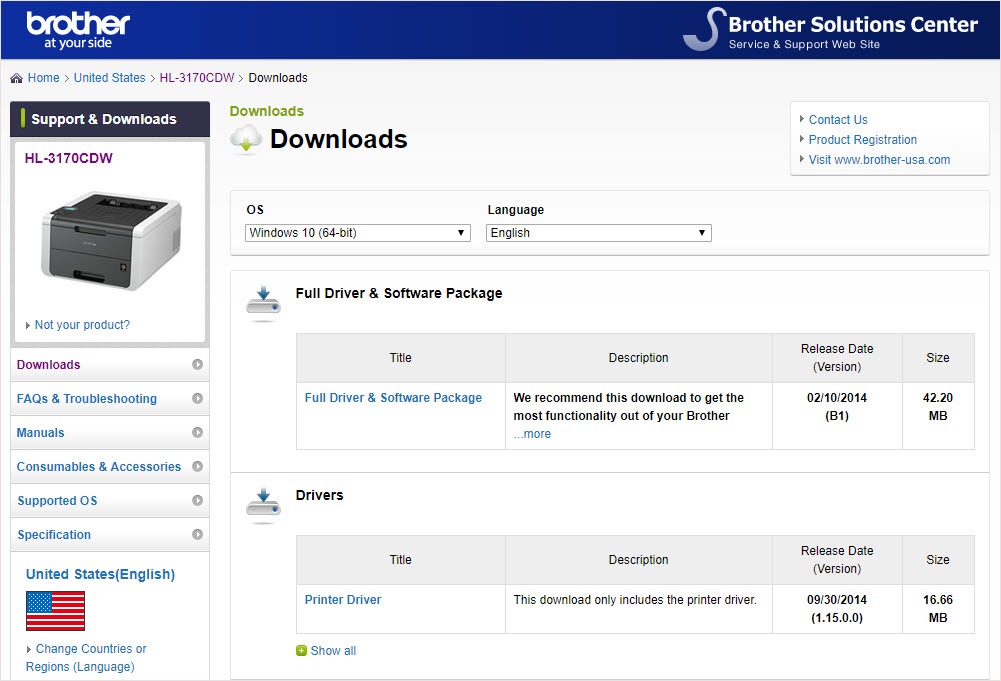
It is important to download and install printer drivers to make it easy for your device to communicate with each other. Hence, you must download them to your computer device using the procedure given below:
- In the first step, open an internet browser and navigate to
support.brother.com.
- Then, move on to the Software
& Drivers Downloads on the website.
- Now, search your printer model in the search bar.
- After that, select an operating system you’re using
(Windows or Mac).

- In the next step, you’ll see a list of printer driver
packages for your printer model.

- Afterward, select a package you liked the most and hit the Download button.
- Go to your downloads folder, extract the driver’s file, and
run the installation.
- Finally, you have the necessary printer drivers for your printer.
When
you have finished downloading printer drivers for the printer, you can learn how to setup Brother printer on WiFi.
Step 3: Setup
Brother Printer on WiFi
In
this step, you’ll actually learn to setup your printer on WiFi. I’m explaining
the two best methods here. You can choose the method as per the type of printer
model you use.
Method 1: Setup Brother Printer Without a Display on WiFi
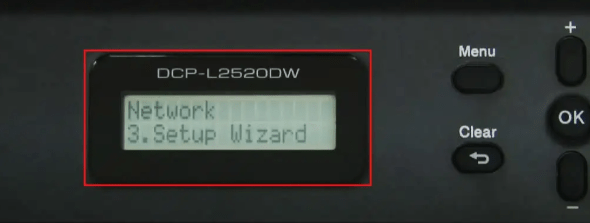
Not all brother printers have a display. Hence, if you want to setup a printer without a display, you should follow the steps below.
- To start, connect your printer to a power connection.
- Then, start the power supply to turn on the printer.
- Now, go to the Menu
button on your printer to start it.
- After that, find the submenu under Network Settings using your printer’s Up and Down arrow keys.
- Next, select the Setup
Wizard option using the Up and
Down arrow keys.

- When you turn on the Setup
Wizard, hit Yes to enable
WLAN.
- In the next step, allow your printer to scan all the
available networks.
- To continue, go to your wireless network using your
printer’s arrow keys.
- Enter your network’s password when your screen asks you to
do so.
- At last, your printer will confirm the connection.
Finally,
you know how to setup Brother printer on
WiFi without a display. You’re ready to print through your brand-new
printer. Let’s start the print journey.
Method 2: Setup Brother Printer with a Display
If your printer has a touchscreen, this step is for you. Check all the steps to learn the printer setup on your device.
- First of all, connect your printer to the power supply and
turn it ON.
- Then, tap the WiFi button
on your printer’s screen.
- Now, click on the Enable
WLAN option on the screen.
- After that, you must choose your wireless network from the
on-screen list.
- In the next step, type your network key and password.
- In the last step, your screen will confirm that the
connection has been completed.
You
know how to setup Brother printer on
WiFi when your printer has a display. Now, you can start your printing
journey with your printer.
Conclusion
I
hope you found my blog meaningful and useful for your printer-related concerns.
Setting up a brother printer can be a difficult task for many. Hence, I tried
my best to deliver a stepwise guide that helps you handle your printer with
ease. With all these easy-going steps, you can definitely setup a secure
connection between your printer and computer device. However, you can setup a
connection between your printer and a mobile device, too. You will just need to
install the Brother Mobile Connect
application from the respective app store.
FAQs
How to Connect Brother Printer to Laptop?
You
can use various methods to connect your printer to a laptop. Overall, there are
three best ways: via USB, Bluetooth, and WiFi. A USB connection is the easiest
way to connect your printer to a device such as a laptop. Moreover, Bluetooth
and WiFi connections are good for printing wirelessly.
How to Connect Brother Printer to Phone?
To
connect a printer to a phone, follow the given steps:
- Navigate to Settings
on your smartphone and select WiFi.
- Then, turn on the WiFi
option.
- Find your SSID network and click on it.
- Now, install the Brother
Mobile Connect app on your phone.
- Under the app, click on Add Machine.
- Also, type your printer’s model number to connect it.
- Let the connection finish, and click on the Connect option at the end.
How Do I Connect My Brother Printer to an iPhone?
To connect
your printer to an iPhone, you need to install the Air Print application from
the App Store. This technology
allows you to print seamlessly through your printer. The other steps to connect
your iPhone and printers are as common as those for a normal Android phone.
Visit - How to Setup Brother Printer on WIFI
How to connect Brother printer to laptop


Comments
Post a Comment